Working on it

So with my last post deciding what I should work on I have started working! You should feel proud! I feel proud! However as I have been sick for going on about two weeks now I haven’t gone out and gotten new shots…… How am I working you ask?  That is a good question! Youtube and Adobe tutorial videos and such! Yeah for the computer!

Everyone knows that the camera can’t see what you see in fact sometimes it’s way off~ way way off sometimes if you are me. If you are working with a DSLR, welcome to heaven and purgatory! Better known as Photoshop and Lightroom in my case. One I have trouble getting it just right in but when I do it’s great and two is fantastic for organizing and non-serious edits but I hardly get any photos out of it, they just sit in limbo. More of a personal problem I know but I would like to believe that it happens to all photographers at one time or another.

So what have I been doing about it you ask. Well first I watched The Grid: How to be a better Photographer in 2014 and as you know I scrapped my 365 project, we had that lovely discussion earlier. I decided I needed to learn PS and LR better than I already do, which involved me buy Scott Kelby’s book covering Lightroom 5 because I like his writing and his book usually covers enough to get me going into the extras that I can later explore on my own. So started flipping through that learning some new tricks and tips. I headed online and watched a bunch of educational(FREE) videos because I wasn’t going out in the wind and cold. So with my hot chocolate I sat down to absorb all I could in about 3 or 4 hour segments.

I realized that I did not know as much as I thought I did. So then I decided to delve into all the photos! I mean ALL THE PHOTOS… I hate deleting, that just in case always gets me. So I decided to start just randomly and closed my eyes and clicked a folder. It happened to be my Shirakawago trip. I then picked a photo I really liked but I couldn’t get to work/look the way I wanted. This was the photo I started with….Snow in Color - Original
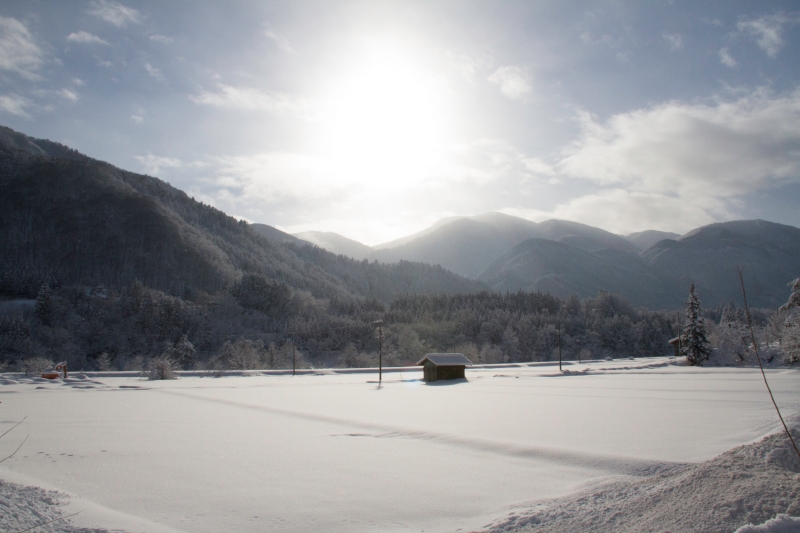
So as you can see it’s kind of flat, a little boring and not really at all how that morning looked to me. The snow is rather gray and a little dirty~ Not really the pristine snowy landscape I saw. So using all the wonderful information I has absorbed I took it all into lightroom, took 3 of the different exposures, bumped them over and into HDR in photoshop and then SURPRISE, SURPRISE I bumped them back into LR as a 32bit TIFF! Oh the things you learn… So about an hour or so later, yeah I’m still learning LR, I had a final-ish product.

Snow in Color

Now I tried to crop it so those little branches on the side disappeared but the crop looks funny and as much as I don’t like them I have started to like them. Not sure if that is good or not. So what do you think? Let me know! More and more the work continues. So much more to do and learn and hopefully when I get over this stupid sickness I will be able to get out and get more shots.

A need shutter actuations~

Collab Post: Hack My Photo! #1

Alright, dear readers, Kate here.  Today’s a special day for all of you!  Today, Anne and I have teamed up for a post!  It’s a new thing we’ll be repeating a lot as we get this whole “post a blog post” thing under our belts.  Today’s collaboration is called Hack My Photo! and here are the rules:

  1. You choose a photo for your partner in crime to edit.
  2. This photo cannot be more than a year old.
  3. You have a set time limit to edit the photo you are given.  Our time limit is 30 minutes.

And that’s it.  Pretty easy.  Except when you’re editing a photo you didn’t take.

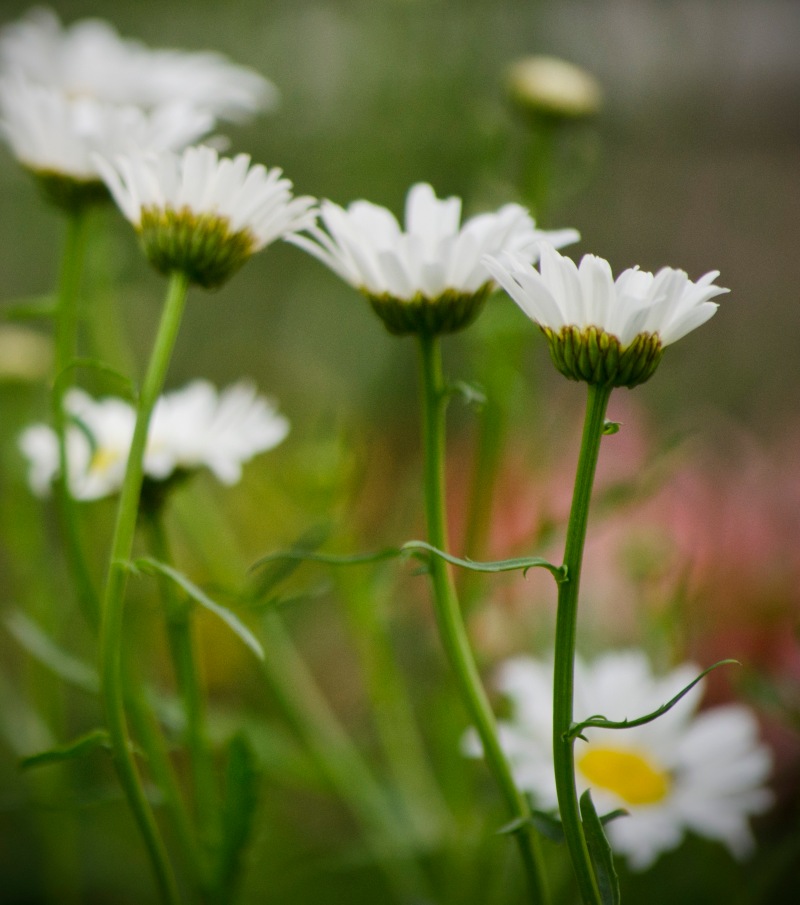
Here’s the original photo Anne sent to me unedited, followed by the original unedited photo I sent to her.

Anne's original photo.

Anne’s original photo.

Kate's original photo

Kate’s original photo.

We’ll start with my edits because I’m the one typing this up.  When editing photos, I don’t usually even think to crop them.  This is because my shooting style is to zoom in/out to get the shot I want or move around until it’s framed the way I want it without me having to crop it in post.  So then, my first thought with the photo I was given was to bring out some sunlight and brighten the sky up a bit since it looks like it was a dreary day the day this photo was taken.  I did all of that in Camera Raw by adjusting the exposure and brightness and such.  I fiddled with specific colors’ saturation levels to try to get the sky even the tiniest bit more blue, but couldn’t make it work.  So I took the photo into Photoshop.  My go-to edit is Linear Contrast, so I slapped that on before doing anything else.  I love the way it looks.  From there, I did some more hue altering and brought out the blue in the sky by using the magic wand to select the sky area, making a new layer, adjusting the hue and saturation, and then changing that layer’s opacity to make it look more natural and less obviously edited.  I also did something similar to get the dark colors darker – I copied the original layer in Photoshop and layered it on with Darken and adjusted the opacity until I had it where I like it.  I tend to like darker photos with heavier contrast, and that’s what I ended up doing with this one.

Edited only in Camera Raw.

Edited only in Camera Raw by Kate.

Continued edits in Photoshop.

Continued edits in Photoshop by Kate.


Anne's edit of her own photo.

Anne’s edit of her own photo.

And now, here’s Anne’s bit, as written by her:

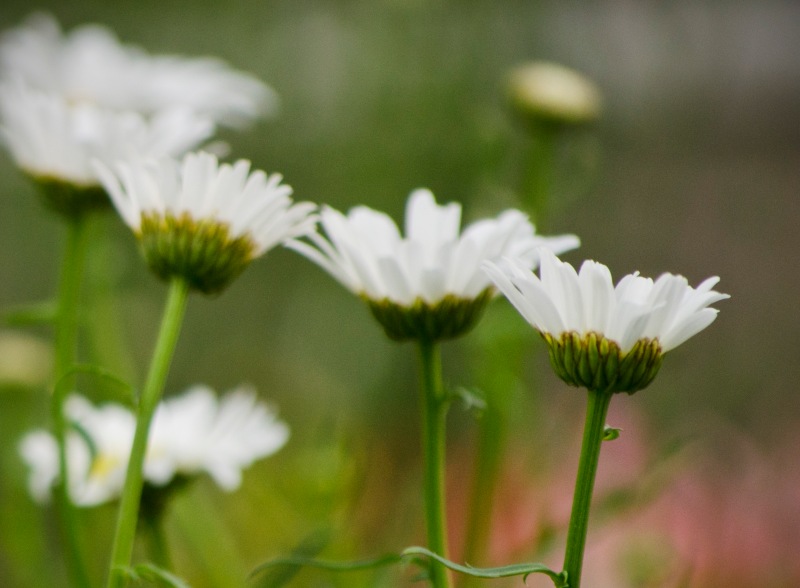
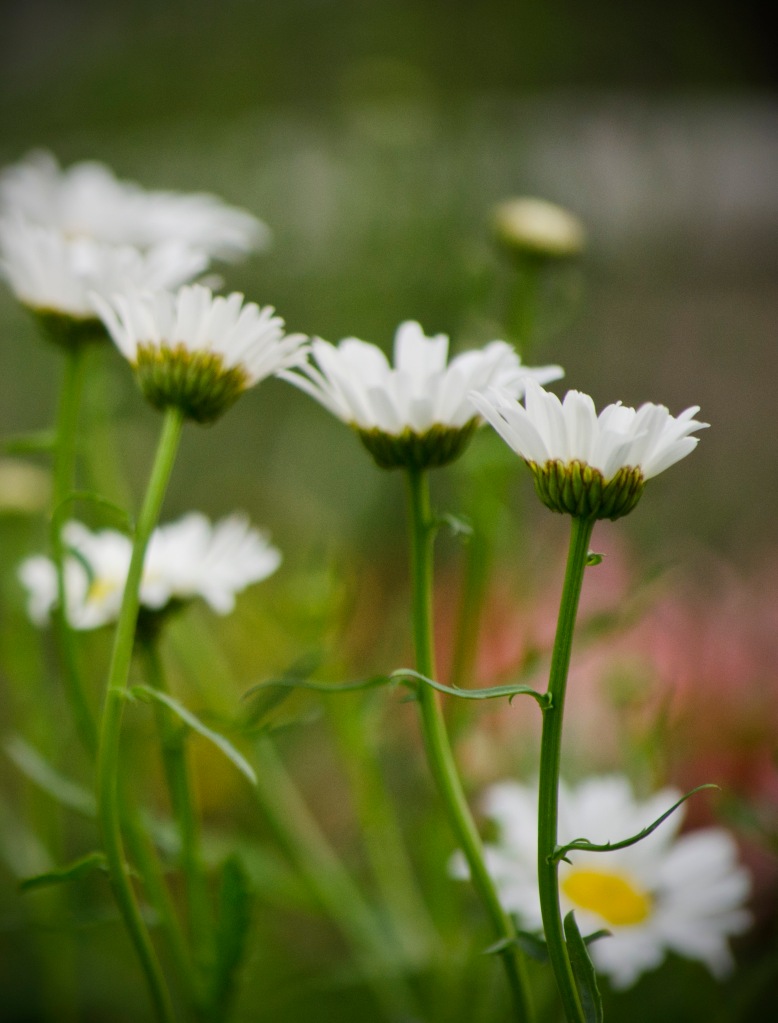
When I first saw this photo I loved the colors, the purple, yellow, white and bright spring green. So I opened it and got into editing it. However, because I am OCD or ADHD or whatever other acronym you want to throw in there my eye kept being drawn to the brown curly leaf(?) behind the iris. So I thought okay I will take this into PS and be done with it… I forgot about the fuzzy yellow stuff! So to cut a long story short it was just too much work in the 30 min time limit we gave ourselves. I liked the daisies on the right side and so I just went with them. For the first edit after doing a screen layer and a multiply layer and flattening them both in-between I went into the lens distort filter and added a small vignette and then a small bowing of the lens to give it a miniscule fisheye effect but in reality to bring the front flower and stem closer. The second part I didn’t crop as close as I wanted more of the vignette and more of the colors. I love the hint of pink in it. For the last one I cropped it closer but I’m not sure if I am happy with the results as you can see grain/noise in the photo. If I had more time I would probably go back in there with my pen and get all the fuzzy yellow stuff and use the picture as a whole but my (acronym here) wouldn’t let me.


Anne's first  edit.

Anne’s first edit.

Anne's second edit.

Anne’s second edit.

Anne's third edit.

Anne’s third edit.

Kate's edit.

Kate’s edit of her own photo.


Kate here again to send you off, dear readers.  What do you think?  Do you think our editing styles are similar?  Would you have edited either photo differently?  Let us know in the comments!  We’d love to hear from you, our lovely readers!

Get out there and shoot!

Kate & Anne

Introduction Part 1

Hey all!  My name is Kate, and I’m one of the writers for this blog.  If you’re reading this, you’re probably wondering something along the lines of “Why are you, of all people, starting a blog?”  Am I right?  I bet I’m right.  Well, I’d be happy to explain my reasons behind getting involved with this blog.  I want to improve my photography – both technically and knowledge outside of knowing how to operate my camera.  That’s the main reason.  The other big reason is that I’m beyond pumped to be working collaboratively with one of my best friends – Anne.  You’ll hear more from her later, as she’ll do her own introduction post.

Anne and I have known each other since 2006, when we met in college.  We’ve been friends ever since!  And even though she’s living in Japan and I’m still stuck in the States, the distance can’t keep us apart.  Anne’s actually the person that got me into photography as more than just a hobby.  She’s been shooting longer than I have, and I respect her and her work quite a bit.  But we both want to improve, hence us doing this blog together.

My current shooting style is based heavily on using natural light with minimal editing.  Natural light doesn’t mean I like to go out and shoot nature (although I like to go out and shoot nature), I just don’t use flash or external photographic lighting if I can avoid it.  HINT: I can avoid it pretty much all of the time.  Which works just fine for me.

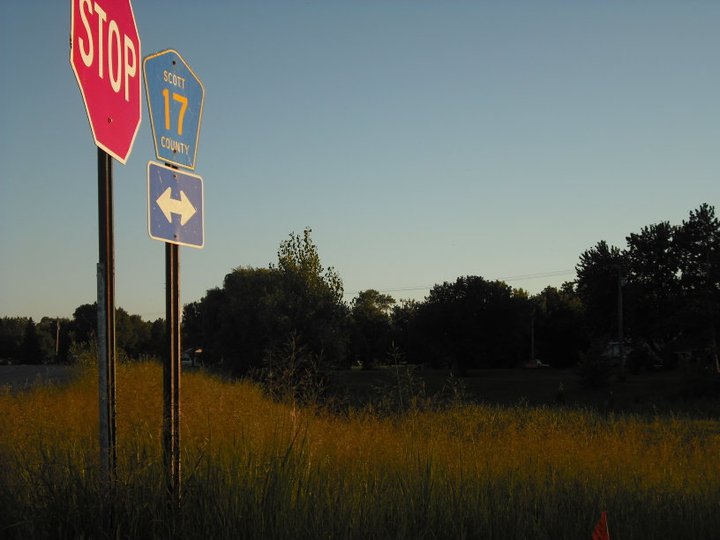
Stop

Shot with a Nikon D3100, no editing.

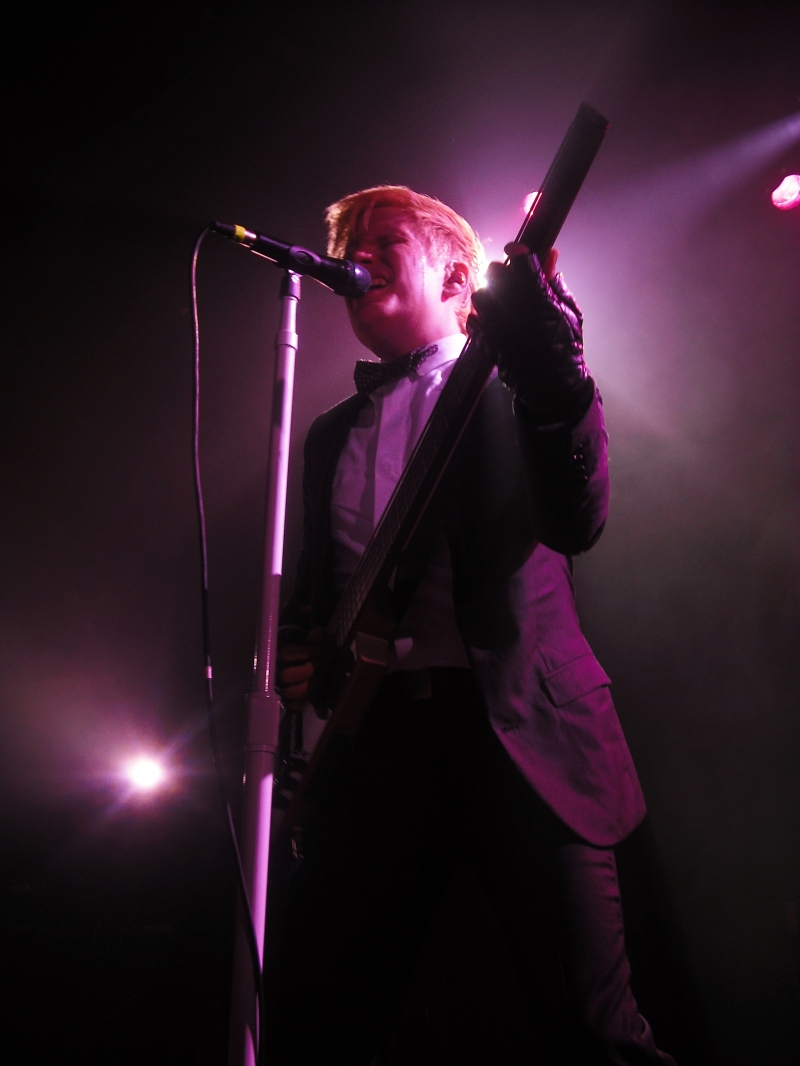
I’m big into landscapes, although I do people as well.  Concerts are my specialty.  The low light really suits my style and I see it as a challenge to get the best shot in an environment where the lighting is constantly changing and the subjects are constantly moving.  I hope you’ll stick around and watch my shooting and editing styles develop and change.  I’ll leave you with my favorite photo I’ve ever captured, and one that means a lot to me not only because it’s one of my best works but also because of the story behind it.

Patrick Stump @ The Varsity Theater in Minneapolis.  Fujiifilm Finepix J10.  Edited in Photoshop.

Patrick Stump @ The Varsity Theater in Minneapolis. Fujiifilm Finepix J10. Edited in Photoshop.

One last note, I will be posting every Thursday to the best of my ability, so keep checking back every week for new stuff!

Get out there and shoot!
-Kate